I love these little inflatable rabbits. They are soo cute! Once folded you blow in the nose to inflate your little creation. My children were amazed!
Start with a square piece of paper. Although Origami paper will be easiest its not a necessity. I used standard white paper to create these.
1. Fold in half vertically and crease the line. Open and fold in half horizontally and crease the line. Open and you should end up with crease lines that look like this.
 |
| Step 1. |
|
|
|
2. Flip paper over and fold diagonally into a triangle (bottom right meets top left), crease line, and open. Fold into a triangle in the opposite direction (bottom left meets top right) and open.
You should end up with crease lines that look like the picture below. Your diagonal creases will make mountain folds (ones that stick out) and your horizontal and vertical creases will have made valley folds. (ones that go inwards)
 |
| 2. Your paper should look like this! |
3. Collapse into a triangle by pushing the opposite valley folds into the middle. If you have creased the lines into your paper well this should be simple.
 |
| 3a. Push the Valley folds together |
 |
| 3b. Flatten into a triangle |
 |
| 3c. Lie flat on the table. |
4. Fold both of the corners into the center like the images below.
 |
| 4a. Right corner to center |
 |
| 4b. Left corner to center |
5. Fold the tips of the triangles into the center.
 |
| 5a. Right tip to center |
 |
| 5b. Left tip to center. |
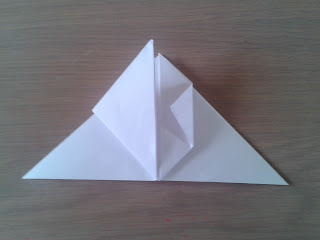
6. Fold the top tips into center and crease well. Next fold them down diagonally and tuck into the pockets on the top of the triangles below.
 |
| 6a. Fold top tips into center |
|
|
 |
| 6b. Right tip folded diagonally and tucked into pocket. |
 |
| 6c. Left tip folded and tucked into pocket. |
|
|
|
7. Flip over and starting from the center top fold each side into the center.
 |
| 7a. Flip over :) |
 |
| 7b. Right side folded into center |
 |
| 7c. Left side folded into center |
8. Fold the end tips diagonally like shown below
 |
| 8a. Right side folded diagonally |
 |
| 8b. Left side folded diagonally |
9. Fold diagonally into the center again like shown in the picture below
 |
| 9a. Right corner to center |
 |
| 9b. Left corner to center |
10. Collapse the rabbit in half by folding the two sides together so that the left ear meets the right. Turn around and do the same with the bottom two flaps so that when your done your rabbit will be laid flat on the table.
 |
| 10a. Nipping the two sides together to collapse |
 |
| 10b. Rabbit collapsed and laid flat. |
11. Finally blow in the rabbits nose to inflate :)
 |
| Blow here |
 |
| Ta Da! |


No comments:
Post a Comment